Appearance
GIF Capture
PixPin supports recording dynamic images, making it convenient for users to perform simple screen recording. After selecting the recording area in the screenshot interface, click the GIF icon to enter the GIF recording page.

Screenshot Interface
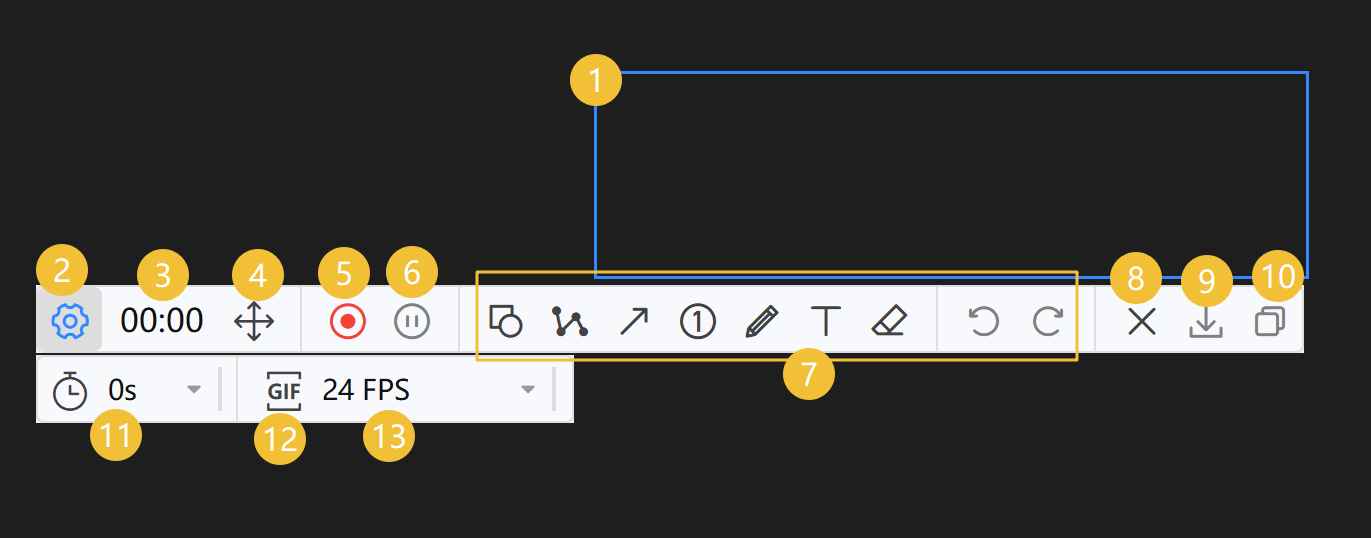
- Screenshot Area Box: The content displayed within this box will be the captured part. Red indicates recording is in progress. Blue indicates waiting to start, at which point you can use the mouse to adjust the size of the screenshot area box.
- Settings Button: Click to open the settings bar to set delay screenshot, screenshot format, and frame rate.
- Recording Time Display: Shows how long the recording has been.
- Move Button: Hold down the mouse to move the screenshot area box.
- Record Button: Click to start recording. Click again during recording to stop recording.
- Pause Button: Click to pause recording. Click again to resume recording.
- Annotation Toolbar: You can use annotation tools during the recording process.
- Close Button: Close GIF recording.
- Save Button: Save the recorded GIF. Available after stopping recording.
- Copy Button: Copy the recorded GIF to the clipboard. Available after stopping recording.
- Recording Countdown: After setting, it will wait for the specified time before starting recording.
- Recording Format: Supports GIF, WEBP, and APNG formats. Click to switch formats.
- Frame Rate: Set the recording frame rate.
Shortcuts
During GIF recording, you can use the screenshot shortcut (default is Ctrl + 1) to start recording, and press the shortcut again to stop recording.